
 Andrej Studen
3a8efc5d55
Making sure insertCell takes no argument for proper ordering of forms in formPortalNew
Andrej Studen
3a8efc5d55
Making sure insertCell takes no argument for proper ordering of forms in formPortalNew
|
2 years ago | |
|---|---|---|
| META-INF | 6 years ago | |
| config | 3 years ago | |
| img | 5 years ago | |
| scripts | 6 years ago | |
| setup | 4 years ago | |
| views | 3 years ago | |
| web | 2 years ago | |
| README.md | 5 years ago | |
| addingUser.md | 4 years ago | |
| softwareUpdate.js | 4 years ago |
README.md
Usage
Initial setup
CRFs are always part of a study. So, create study as you would normally do, keep subject identifier to ParticipantId, which is the default.
Once you do, you should enable CRF module. See LabKey documentation on how to enable a module.
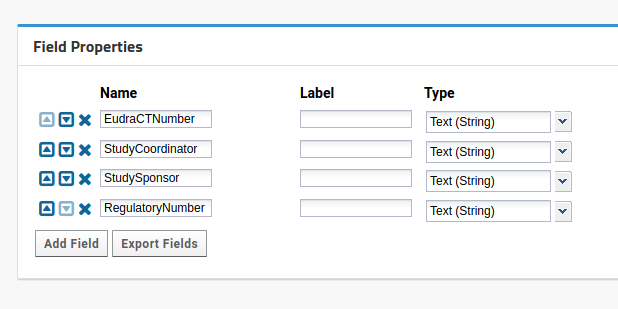
In Study setup, select Edit additional properties. New fields should be:
- EudraCTNumber,
- StudySponsor,
- StudyCoordinator,
- RegulatoryNumber, all as strings. It should look like this
The initial set of setup lists is part of the distribution. Copy archive locally and import list archive to Labkey in the study. You will get list of lists by clicking on setup wheel at the top of the screen and selecting Manage lists.
Create demographicData dataset as part of the study. Copy fields from demographicData list. Create reviewComments dataset. Copy fields from reviewComments list. Fields are copied by selecting a list, pushing Design button, scrolling to the bottom, clicking on Export Fields and Ctrl-C-ing the content of the pop-up window. Fields are paste into the pop-up window that opens by selecting a dataset, pushing Edit design, scrolling to the end and clicking on Import Fields.
Add at least one site to the site list.
Add at least one crfEditor and one crfReviewer, particularly adding yourself is a good idea. Adding is the same ass adding lines to the respective lists.
Setting up a form
Datasets
Create a dataset as a list. Go to Wheel->Manage Lists and Create List. Setup fields as you would normally do. Three additional fields are required:
- participantCode (String)
- submissionDate (DateTime)
- crfRef (String)
Here is an example included with the list archive.
All datasets should be registered by adding them to the inputLists list. The sample dataset should already be a part of the inputList.
Forms
CRF consists of a series of forms, contained in the Forms list. The Forms list has a name, a title and a master query.
Form corresponds to a logical assembly of datasets. The only architectural property of a form has is that all its datasets should be completed before the form is submitted for review. Each form can be reviewed independently.
The last field, master query is to be set to one of the datasets in the form. The master query must contain a participantCode field, and that is the field that will be used as the participant assignment field for all datasets in the form. The sample Forms list already has an entry for demographicsData dataset.
Form setup
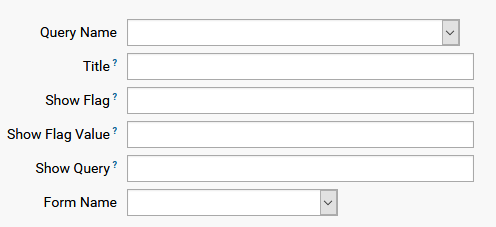
A form setup is a list of datasets in the form and contains the following fields:
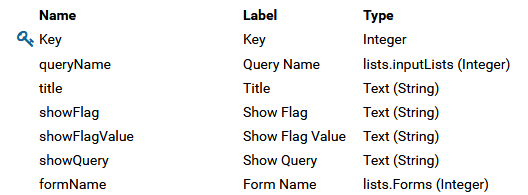
For a new setup list entry, set Query Name to the dataset name with Title that can be any string. Other fields are set to NONE by default. The last field is the Form this dataset will be a part of.
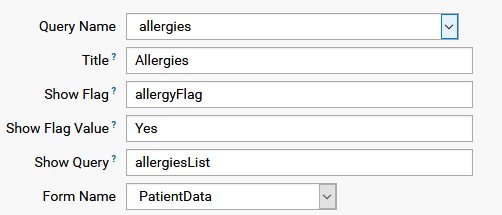
A more complex dataset layout might contain a sub-list, say list of medication, which is enabled by a flag which is part of the dataset. The name of the flag, which is a variable in the dataset, must be given as showFlag, the value where list is to be filled is the showFlagValue, and showQuery is the sublist query which will be shown, as the following example shows:
Filling the form
Add a tab (Wheel->Page Admin Mode, click on a + tab). Add CRF Portal web part. This will show all forms that we will create. If the setup worked, the Demographics form should appear in the CRF tab.
Once you click on create new, a new form is added to the list and the form completion portal opens. If you reload the CRF tab, or go back, you should see a new yellowish square which corresponds to the form just created. You can edit the form until you are ready to Submit it for further review, or Exit if your form needs further data.
Uploading the form to the database
Prepare datasets
When the form gets submitted, a dataset should be created that will get filled with data from the (temporary) dataset list. To do that, go to Manage Datasets in Study management, and create a dataset. When asked for fields, click on Import fields and copy the output of Export fields, performed in the Design view of the List. For each list that gets filled, a mirror dataset is required. Then Uploading lists works.
Setup the review portal
Add a tab (Wheel->Page Admin Mode, click on a + tab). Add CRF Review Portal web part. This will show all forms that were submitted. If the setup worked, the completed Demographics form should appear in the CRF Review tab.
Using review portal
Reviewer has two options - to return form to editor or to submit it. If returned, the form will appear on editor portal and editor can change values. If submitted, the data gets copied to datasets.
Viewing approved forms and reusing them for minor changes
Setup approved portal
Add a tab (Wheel->Page Admin Mode, click on a + tab). Add CRF Manager Portal web part. This will show all forms that were approved. If the setup worked, the approved Demographics form should appear in the CRF Manager Portal.
Reusing approved forms
Resued forms can be reinserted for editor use by clicking on the Restore for further review button. The form is shifted back to the editor, which can change/update values. While not completely to standard, this way allows to correct minor errors that were missed in review. Documenting causes in review fields is suggested for clarity.